Thursday, May 31, 2012

Bankee Gundam Model Kit Contest 2012

Last Sunday, May 27,2012, my girlfriend and I went to The Block SM City North Edsa to witness the closing day of Bankee Gundam Model Kit Contest. Unfortunately we were late to arrive that's why I wasn't able to take a closer look at the entries of different categories. We were just able to view them from a distance because the organizers closed this certain section for judging time.


Different gundam model kits were available for interested buyers. There were also raffles and on-the-spot gundam making contest to make the event more brighter. While on the stage two modelers were discussing and teaching gunpla enthusiasts on different techniques in modeling and customizing.

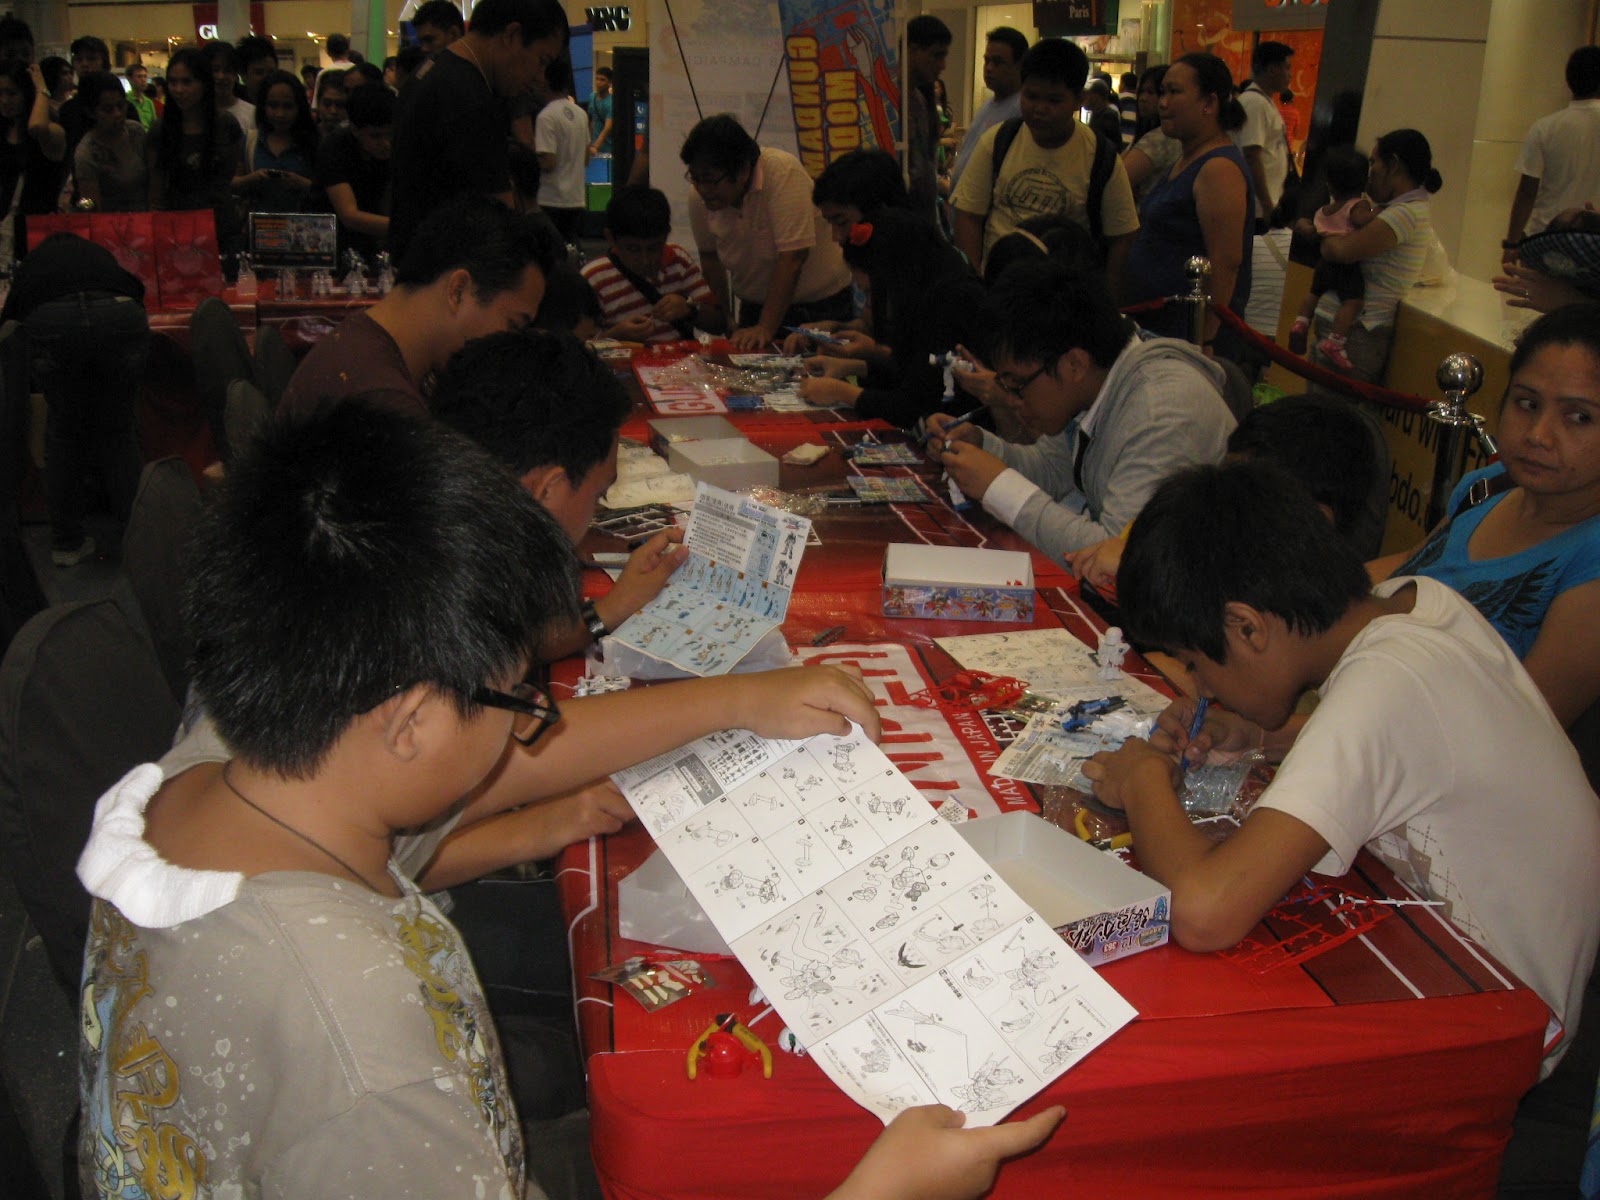
participants in on-the-spot building contest

army of gundam blue frame :D
Since I didn't had a chance to take a close-up pictures of the entries, (plus my digital camera gets low batt from time to time) I just spent my time looking at the samples of different gundams mostly from Seed series. I was upset seeing that recently re-released versions of their 1/144 kits has special effect parts, which is absent when I bought them couple of years ago. Plus the re-released has more vibrant colors than before.


Customized 1/60 gundam models were also displayed in the event. I was so impressed on how they were repainted and redesigned as well. That includes 1/60 Strike gundam, 1/60 Freedom gundam, 1/60 gundam Exia, 1/100 MG Duel gundam, and mobile suits from Unicorn series like my favorite gundam Unicorn Banshee and the red comet - the Sinanju.There were also models that were included in some international gundam events that took home special awards.


The highlight of the event of course is the awarding of the winners from the different categories. There were also special gifts for 8th to 4th runners up, while the top 3 all received trophies, gundam goodeis, and cash. The 1st prize will also participate in the international gundam contest to be held in Singapore. To all the winners.....congartulations to all of you!

These and other more reasons gave me a boost to try joining in the contest next year. There's no harm in trying and it will be a great experience for me for sure ^__^


Wednesday, May 30, 2012

MG Heavyarms EW WIP (Weapons)

I made different approach on every parts of the beam gatling of MG Heavyarms. Here they are:


I painted these parts with RJ gloss black. Then for the barrel clamp and flash suppressor, I give it another round of gloss black and top coated with RJ dull lacquer. For the barrels meanwhile, I air brushed them with Alclad stainless steel until I got my desired effect. I just need Tamiya X-12 gold for the detailing. Unfortunately when I went to Lil's hobby center in Trinoma, they were already closed permanently :( so I need to go to their branch in Megamall to purchase it.


For the ammo belt, I used Pylox metallic smokey black on it while for the tank, I sprayed with thin coats of Tamiya X-10 gun metal. Decals have also been applied.


For these parts, they were painted with coats of gloss black. Only the difference is that the body of the gatling gun (right side) was top coated with dull lacquer while the part on the left was top coated with Tamiya TS-65 pearl clear. The end or tip of the gun was hand painted with Alclad stainless steel.


The army knife was painted way before I started painting the kit. You can check it here if you wanna see how it was done.

That's almost it. Gonna do some little finishing touches and I'm done with this fella. Pictures to be posted soon! ^__^

Friday, May 25, 2012

What Kit to Pick?

Gunpla collectors have different preferences on what kit to collect. Some base it on grades and scales that they prefer, or could be on series that they like. So if you're going to start collecting model kits, you would maybe ask "what would be the best to collect?" Well the answer is simply "it depends on what you like" To explain it further here is a guide on the different grades that gunplas offer.

  • Super Deformed (SD) - A Whole New World of GUNPLA. Striking a keen balance between cute and cool, this tyke-sized series is easy to assemble and easy on the wallet. It is non-scale and stands about 8cm.
  • High Grade (HG) - A Vast Lineup of Collectables. A collectable series featuring a broad lineup of easy-to-assemble kits from star-level item refinements to models not previously released as kits. It is 1:144 scale and stands about 13cm.
  • Real Grade (RG) - The Enthusiasm over Building Mobile Suit at Your Fingertips in 1:144 Scale. Rich coloration, lifelike movements, expressive texture and a pre-built inner frame: It is like a 1:144 kit with articulations and characteristics of a perfect grade (PG) kit. That's why this series makes it real.
  • Neo Grade (NG) - It is just like a high grade (HG) kit...but in a larger scale of 1:100.
  • Master Grade (MG) - Innovative Inner Mechanics and Gimmicks. Bandai's most promoted series packs in movement and gimmicks over innovative inner mechanics. It is in 1:100 scale and stands about 18cm.
  • Perfect Grade (PG) - The Ultimate GUNPLA Packed with The Latest Technology. The highest end of Gunpla, this series of ultimate avatars always packs in the latest technology to seamlessly scale down your model. It stands around 30cm and in 1:60 scale.

source: bandai-hobby.net

example of size comparison (image credit to gundamer.com)
I started collecting first grade (FG) model kits. These are 1:144 scale kits with very limited articulation and colors compare to high grade kits. After my 13th FG kit, it was then I decided to buy my first HG kit - the Freedom gundam. Currently I'm focusing more on collecting MGs. I hope someday I could afford to buy a PG. lol

I'm also more of a Gundam Seed and Gundam Wing fan that's why most of my collections are from those series. Other series include Universal Century, Gundam 00 (which I also have), Gundam Age (currently being aired) etc.

In the end it is still up to the hobbyist on what kit he choose to build and collect. The important thing is that he is enjoying what he is doing. So what are you waiting for....start building your own gunpla now!  ^__^

Wednesday, May 23, 2012

MG Heavyarms EW WIP (Part 2)

Here's the second part of the Master Grade Heavyarms EW that I'm currently working on. This part focus more on the white, red and orange parts of the kit.

For the orange parts that serves as covers of Heavyarms' missiles I highlighted its panel lines by shading it with 0.1 Uni micro pen until all of the panel lines become black. I then put decals on them before spraying with RJ metallic clear and top coated with RJ dull lacquer. The same procedure goes for the white parts....only that I didn't put metallic clear paint on them but instead only dull lacquer.

white and orange parts waiting to dry after putting flat top coat

On the other hand, I painted the red parts with Tamiya X-7 red. When already dried, I put some of my newly bought Tamiya TS-65 pearl clear on them. I wanted to try how the plastics will look like after painting them with the pearl clear...and I was not disappointed. They produced a shiny gloss look especially when reflected with light. Decals were put last this time.

finished product of pearl red parts (no decals yet)

I decided to build the half left of the kit first and see what it will look like compared to the inner frame only. I also put decals on their respective places as seen in the manual to make it look more fascinating. Here's how it looks now.


Just a little bit more and I'm done with it! ^__^

Saturday, May 19, 2012

MG Heavyarms EW WIP (Part 1)

Now that I have more vacant time compared last month, it only means one thing.....I can already paint my Master Grade Heavyarms EW!!! :) I've already seen a lot of blog posts showing their paint customization job on their MG Heavyarms and I admit that I envy them. I really love their artwork. How I wish that I could do the same to mine especially that this is one of the coolest model kit released.

I have already some plans on my mind on what kind of approach I am going to apply to Heavyarms different parts. I just hope that the execution and outcome will be awesome. Well here goes.....

First I diassembled all the parts and grouped them according to their color scheme. I also sub-divided the grey parts based on the tone that I'm planning to give them.


I painted most of the grey parts with Alclad II magnesium using an airbrush. Just like the previous one, I am so satisfied with the outcome of Alclad paints. However since I'm trying to save paint (since Alclad paints are expensive) I did not paint the whole grey parts. I just painted the parts that will be exposed and let the hidden ones unpainted.

grey parts being painted with Alclad magnesium
missile pods waiting to dry after painting

For some grey parts like the circles on the knee and ankle, I first painted it with Tamiya X-1 gloss black and then with Alclad magnesium. I also gave it a top coat of Tamiya TS-65 pearl clear to give it a shiny look.


I also made some modifications on the cream/white parts like the vents and the ones under Heavyarms shoulders. I painted it with Tamiya X-32 titanium silver to have a contrast. I also did the same to its sliding part on the legs.


For the body, I changed the grey parts around it by using Tamiya XF-53 neutral grey. On the other hand, I already like the color of the orange parts so I just sprayed it with RJ metallic clear and top coated with RJ dull lacquer.


For all the missiles/warheads, I painted it with Tamiya XF-16 flat aluminum and highlighted its panel line with a red gundam marker. I'm so happy with the result...excellent! While for the parts that serves as base of the missiles, I simply painted them with Tamiya gloss black and dull lacquer.


To emphasize Heavyarms' vulcans, I dry brushed them with Tamiya titanium silver after painting with Alclad magnesium. I did the same thing on the guns on his chest.


Here is the over all look of my MG Heavyarms EW as of the moment.


I have to deal with the red and white parts next, as well as the remaining orange parts. I hope I'll finish everything before the month ends. ^__^